Mechanical Engineering Guide: Tips for First-Time Product Designers
created on 11/27/2024
Designing a new product is a thrilling yet challenging endeavor, especially for first-time mechanical engineers stepping into the world of product development. Whether you're designing a consumer gadget, an automotive part, or an industrial tool, the journey from concept to creation is filled with opportunities to innovate and learn. This guide offers practical insights and strategies to help you navigate the complexities of product design with confidence.
To ensure success, follow these essential steps:
- Define the Problem: Clearly understand the problem your product will solve.
- Prioritize Functionality: Focus on the key features that add value.
- Choose Materials Wisely: Balance performance, cost, and durability.
- Keep the Design Simple: Avoid unnecessary risks and complications.
- Prototype Early: Test feasibility and identify potential issues.
- Collaborate with the Manufacturing Team: Ensure your design is manufacturable.
- Test Thoroughly: Simulate real-world conditions to guarantee reliability.
Step 1: Define the Problem
Every great product starts with a clear understanding of the problem it aims to solve. Imagine you've been asked to design a new ergonomic chair for office workers. Before sketching ideas or choosing materials, ask yourself:
Who is this product for? What specific problem does it address? How will it improve the user's experience?
For example, office workers might struggle with back pain from prolonged sitting. Your ergonomic chair could address this by incorporating adjustable lumbar support and advanced cushioning. Take the time to research your target audience and gather as much data as possible. This foundational step not only ensures your product serves a real purpose but also guides your decisions throughout the design process.
Story: A startup once approached a mechanical engineer to create a compact coffee grinder for urban dwellers. By focusing on the target audience's need for portability and efficiency, the engineer developed a foldable grinder that became a bestseller.
Step 2: Prioritize Functionality
While aesthetics and innovation are essential, functionality must always take center stage. Think about the core purpose of your product and ensure that it delivers on that promise without unnecessary complexity.
Take a car seat design as an example. Its primary function is to keep passengers safe and comfortable. By focusing on these two aspects—safety and comfort—you can avoid distractions like overly complicated adjustment mechanisms or unnecessary decorative features that might compromise its usability.
Tip: Simplicity often leads to better functionality. Avoid adding features just because they seem "cool." Instead, ask, "Does this add real value to the user?"
Step 3: Choose Materials Wisely
Material selection is a critical aspect of product design that requires balancing performance, cost, and durability. Each choice you make will affect the product's functionality, manufacturability, and environmental impact.
For instance, let's say you're designing a water bottle. Plastic may be lightweight and affordable, but stainless steel offers durability and better insulation. Understanding the trade-offs between materials helps you make informed decisions that align with your product goals.
Consider the environment: Is the material recyclable?
- Think about manufacturing: Will this material increase production costs or time?
- Evaluate user needs: Does the material improve the product's performance?
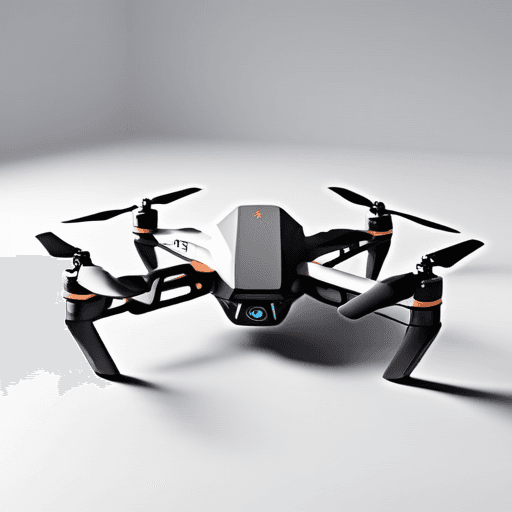
- Case Study: A team designing a drone chose carbon fiber for its frame due to its high strength-to-weight ratio, even though it was costlier than aluminum. The material choice significantly improved the drone's flight performance.
Step 4: Keep the Design Simple
The phrase "less is more" rings especially true in mechanical engineering. Simple designs are easier to manufacture, assemble, and maintain. They also minimize the risk of failure during real-world use.
Consider Apple's success with minimalist product designs. Their devices are sleek and user-friendly because they strip away unnecessary complexity, focusing instead on core functionality. Similarly, when designing your product, think about how you can achieve elegance through simplicity.
Example: Instead of designing a hinge with multiple moving parts, explore if a single pivot point can accomplish the same task.
Step 5: Prototype Early
Prototyping is where your ideas come to life. An early prototype doesn't have to be perfect—it's a tool to test feasibility, functionality, and design assumptions. Rapid prototyping technologies like 3D printing or laser cutting allow you to iterate quickly.
For instance, if you're designing a mechanical arm for an assembly line, a 3D-printed prototype can reveal whether your design can handle the required load or if adjustments are needed. Testing this early on saves time and resources compared to identifying issues after the manufacturing stage.
Pro Tip: Involve stakeholders, such as end-users or clients, during the prototyping phase to gather valuable feedback.
Step 6: Collaborate with the Manufacturing Team
Manufacturability is often an overlooked aspect of design, especially by first-time engineers. Even the most innovative design will fail if it's too costly or difficult to produce. Collaborate closely with the manufacturing team to ensure your design can be efficiently translated into a finished product.
Ask questions like:
Are there ways to reduce production time or costs?
Can design changes simplify the assembly process?
Are there manufacturing constraints I need to consider?
Story: An engineer working on a medical device discovered that their design required an advanced injection molding process that would quadruple production costs. By collaborating with the manufacturing team, they simplified the design to use standard molding techniques, saving both time and money.
Step 7: Test Thoroughly
Testing isn't just a final step—it's an ongoing process that ensures your product performs reliably under various conditions. Create a rigorous testing plan that mimics real-world scenarios. For example:
- Stress testing: Push the product to its limits to identify weak points.
- Environmental testing: Test the product under extreme temperatures, humidity, or vibrations.
- User testing: Observe how real users interact with the product to uncover usability issues.
Testing allows you to refine your design and address flaws before mass production, saving you from costly recalls or dissatisfied customers.
Tip: Document all testing results thoroughly. This data can guide future improvements and serve as evidence of your product's quality. Conclusion
Designing a new product is more than just a technical challenge—it's a journey of problem-solving, collaboration, and creativity. By following these steps, you'll not only develop a functional and manufacturable product but also gain invaluable experience as an engineer. Remember, great design isn't just about aesthetics; it's about creating solutions that make a difference in people's lives.
As you embark on your design journey, keep learning, iterating, and pushing boundaries. Every prototype, test, and revision brings you closer to creating something remarkable. Happy designing!
Pro Tip: Always consider manufacturability and cost-effectiveness from the very beginning. It saves time and money down the line.
By following these guidelines, you'll navigate the product design process more efficiently, ensuring success for your projects.
Share this article

Vlad Cucos is the founder of Rooster Dynamics and serves as its head mechanical engineer. With a deep passion for innovation and a commitment to staying ahead of the curve in the latest technologies, Vlad combines technical expertise with visionary leadership. His dedication to creating impactful solutions drives the success of every project he undertakes, making him a trusted voice in the field of mechanical engineering and product design.
Related Articles

The Power of Software: How Custom Solutions Can Transform Your Business

Product Design Essentials: From Problem to Solution and How to Define Product Requirements That Matter

